
By Chance, owner of Southern Gutters FL · Published · Last updated
Key takeaways
- Corners and end caps are the only joints on a seamless system, so they carry all the stress.
- Daily heating and cooling makes long aluminum runs grow and shrink, flexing the sealant at every corner.
- Household caulk and silicone over dirty metal are the most common reasons a repair fails.
- A real fix means cleaning to bare metal, riveting, and resealing with gutter-grade sealant, or replacing the miter.
- Leaves dammed at inside corners keep joints wet and speed up failure.
Gutters leak at the corners because each miter is a joint, not one piece of metal. Daily heat cycling cracks the sealant, debris holds water against it, and quick caulk over dirt never bonds. The real fix is stripping old sealant, cleaning to bare metal, re-riveting and resealing with gutter sealant, or replacing the miter.
If you only have one leak in your gutter system, odds are it is at a corner. A gutter leaking at the corner is the single most common repair call we get, and it is also the one homeowners most often try to fix with a tube of caulk from the hardware store. That patch tends to last until the next rainy season.
Corners leak for specific reasons, and once you understand them, the lasting fix makes sense. Here is what goes wrong inside a miter, how to pin down the joint that failed, and what a proper rebuild involves.
What a gutter corner actually is
On a seamless system, the long straight runs are one continuous piece of aluminum. The corners are not. Each inside or outside corner is a miter: two ends cut at an angle and joined, either with a factory-made corner piece or a field-cut joint wrapped with a metal strip. Rivets hold the pieces together, and sealant fills the gaps.
End caps are similar: a shaped cap crimped or riveted onto the cut end of the run and sealed from the inside. Outlets, where downspouts drop out, are the third type of joint. On a typical single-story house, that is maybe a dozen joints in total, and almost every leak we find lives in one of them.
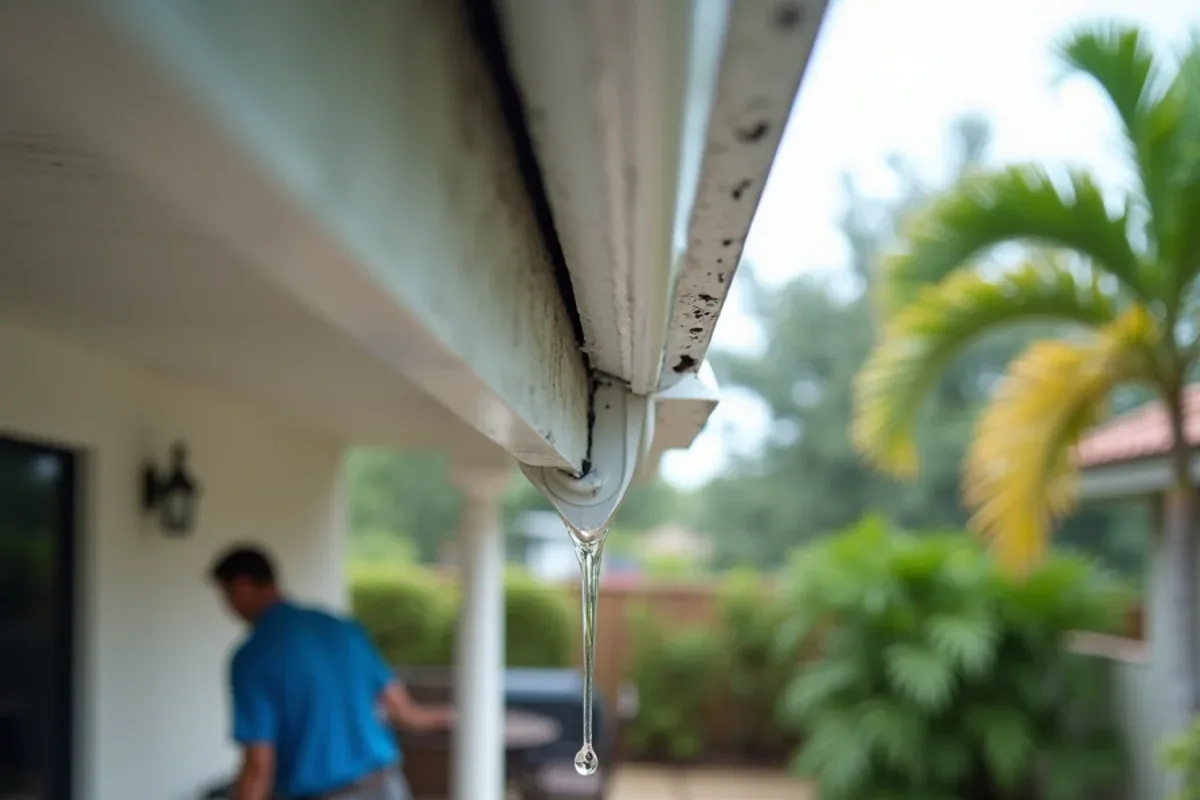
Why a gutter miter leak keeps coming back in Florida
Heat cycling
Aluminum expands noticeably as it heats. A long run baking on a south-facing eave on an August afternoon, then hit by a cold downpour, moves every single day. The corners are where two runs meet at an angle, so that movement pushes and pulls on the joint. Over years, sealant that cannot flex enough cracks or peels away from the metal.
Sun and age
UV breaks down sealant, especially on the exposed outside face of a miter. Sealant applied ten or fifteen years ago has usually hardened and shrunk.
Debris dams
Water slows at an inside corner, and black olive leaves, oak tassels and seed pods settle there. The pile holds water against the joint for days, so any small gap gets a constant supply.
Bad patches
Silicone and general-purpose caulk smeared over dirt, old sealant or wet metal do not bond. They look fine for a few weeks and then lift at the edges, which can trap water and make the leak worse.
Gutter seam leak or end cap leak? Finding the exact spot
Drips travel. Water can enter at the miter and run along the underside of the gutter before falling a foot away. A hose test pins it down.
- Clear any debris from the corner so you are not chasing a clog.
- Run a garden hose gently into the gutter a few feet upstream of the corner.
- Watch the underside of the joint with a flashlight, even on a sunny day.
- Look for where water first appears: along the cut line, at a rivet head, or behind the gutter on the fascia.
- Repeat at each end cap and outlet on that run.
If water shows up behind the gutter rather than through a joint, the problem may be at the roof edge, not the miter. That is a different job, handled as roof-edge leak repair.
| Where you see water | Likely cause | Lasting fix |
|---|---|---|
| Along the miter cut line | Sealant cracked or lifted | Clean to bare metal, reseal with gutter sealant |
| At rivet heads in the corner | Loose or missing rivets | Re-rivet and seal the heads |
| Whole corner sags and drips | Hanger missing near the miter | Add a hanger, then reseal |
| Around the end cap rim | Cap loose or sealant gone | Re-crimp or replace the cap, seal inside |
| Around the downspout outlet | Outlet seal failed or cracked | Reseal or replace the outlet |
| Behind the gutter, on the fascia | Water missing the trough at the roof edge | Roof-edge flashing or drip edge work |
| Corner metal split or kinked | Impact or years of flexing | Cut out and replace the miter |

How to fix a leaking gutter corner so it stays fixed
A lasting corner repair is mostly preparation. Our crews follow roughly this order:
- Scrape out every trace of old sealant from inside the joint.
- Clean the metal and let it dry completely; in rainy season we schedule around afternoon storms for this reason.
- Check rivets and replace any that are loose, adding more if the joint flexes.
- Apply a gutter-grade sealant made to bond to aluminum and stay flexible, worked into the seam rather than smeared on top.
- Let it cure, then water-test before leaving.
If the miter metal itself is cracked, bent or has been patched over many times, we cut it out and install a new corner. That is usually still far less work than replacing the run. Our leaking gutter repair service covers corners, end caps, outlets and the occasional seam on older sectional systems.
Doing it yourself?
If you reseal a corner yourself, skip the silicone. Buy a sealant labeled for gutters, clean the joint until it shines, and work on a dry day. If the corner is two stories up or over a tile roof, call a pro instead.
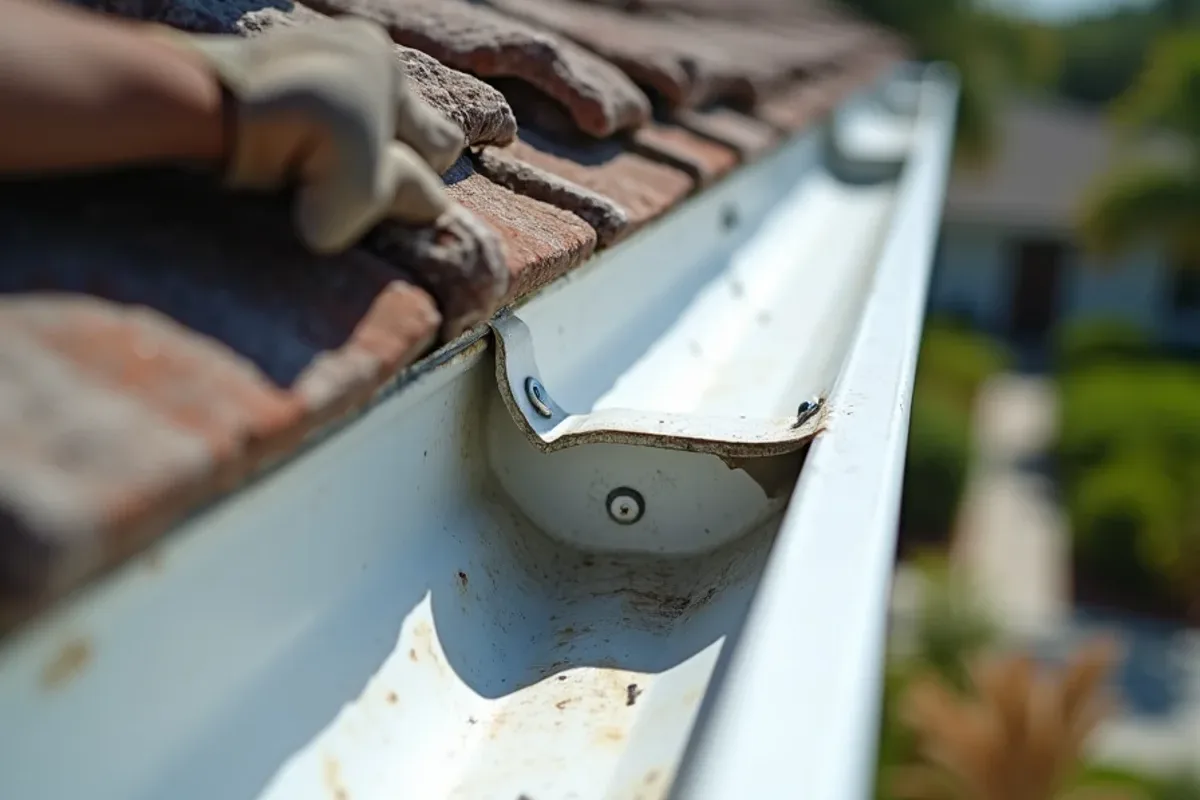
What we find when we open up a leaking corner
Corners come in two styles, and each fails in its own way. A factory-made box miter is a stamped piece with consistent angles and two seams to seal. A field-cut strip miter is formed on site, with the two runs cut and wrapped by a band of matching aluminum. Strip miters fit the odd angles on hip roofs and bump-outs better, but they depend more on the installer’s care with rivets and sealant.
Under the old caulk, we usually find one of a few things: sealant laid on top of the seam instead of worked into it, a missing rivet on the bottom face, or a corner with no hanger within a foot or so, so the joint flexes every time the gutter fills. Sometimes the run is pitched toward the corner and the outlet sits at the far end, so the miter spends every storm under standing water.
The honest trade-off: a careful reseal is a maintenance item that buys years, not forever, because the sun keeps working on it. A rebuilt or replaced miter with a hanger beside it and better outlet placement lasts longer, but takes more time on the ladder. When a whole system is dripping at every joint, the conversation moves to gutter repair across the house or a seamless replacement.
Keeping corners dry, and where we see the most corner leaks
Most corner leaks can be delayed for years with two habits: keep inside corners clear of leaves, and check the joints once a year before the rainy season starts. An extra outlet near a long inside corner also helps, because less water rushes into the joint during a cloudburst.
We see a lot of corner and seam work in Lauderhill, where older single-family streets and 1960s–70s condo buildings around Inverrary have gutters that have been patched for years. Nearby Lauderdale Lakes has dense blocks of CBS homes on tight lots, so a dripping corner often splashes straight onto a walkway or the neighbor’s side yard.
A dry corner starts with the right diagnosis
Find the exact joint with a hose test, then fix the cause: cracked sealant, loose rivets, a missing hanger, a damaged miter or water getting behind the gutter at the roof edge. Skip the silicone, keep inside corners clear of leaves, and check every joint once a year before the rainy season.
If a corner keeps dripping after you have tried, call Southern Gutters FL for a free estimate. We will water-test the joint, show you where it fails, and tell you whether it needs a reseal or a new miter.
Questions about gutter leaking at corner
Is gutter sealant enough to fix a corner leak?
Often, if the metal is sound and the joint is cleaned properly first. Sealant alone fails when it goes over dirt, old caulk or a loose joint. If the rivets are loose or the miter is cracked, those need fixing before any sealant will hold.
Why does my new seamless gutter leak at the corner already?
Usually a joint was sealed in a hurry, the metal was not dry, or a rivet was missed. On an installation, that is covered by a workmanship warranty; ours runs three years on installs. Call the installer and ask them to water-test it.
Can a leaking end cap be fixed without replacing the gutter?
Almost always. A loose cap can be re-crimped, riveted and sealed from the inside, and a bent or corroded cap is a small, inexpensive part to swap. The run itself rarely needs to come down unless the end of the gutter has been crushed or the hangers near it have pulled out.
Why is my seamless gutter leaking in the middle of a run?
A seamless run should have no joints between corners, so a mid-run drip points to something else. Common causes are a splice where an earlier repair joined two pieces, an old hanger or screw hole left open, a puncture from a ladder or falling branch, or corrosion where wet debris or a dissimilar metal sat against the aluminum. A hose test shows which one, and most are a small patch or a short section replacement.
Services mentioned in this guide
Leaking Gutter Repair
Dripping corners, seams and end caps scraped, riveted and resealed, or rebuilt when sealant alone won't last.
Learn moreGutter Repair
Leaking corners, loose hangers, bad pitch and tired end caps fixed with honest, repair-first advice.
Learn moreRoof-Edge Leak Repair
Leaks where the roof meets the gutter traced, flashed and sealed before they rot fascia or stain soffits.
Learn moreServing Lauderhill, Lauderdale Lakes and the rest of South Florida.